As a useful aide to the Season and a follow up to our recent masterclass with The Jackal Magazine, we thought that we should once again post our guide to how to tie the perfect bow tie. Budd are specialists when it comes to dresswear. We offer a range of self tie bows in velvet through to barathea, in either batswing or thistle styles and a range of rich colours, sized or adjustable. Shop our range either online or in store.
Follow our simple steps to achieve the perfect bow every time and being all fingers and thumbs will soon be a distant memory.
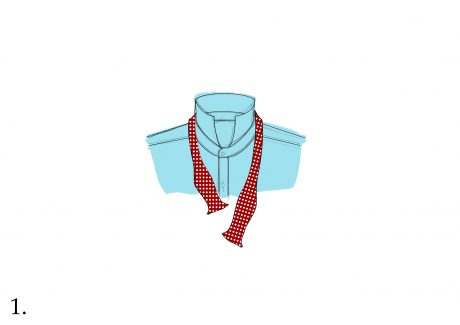
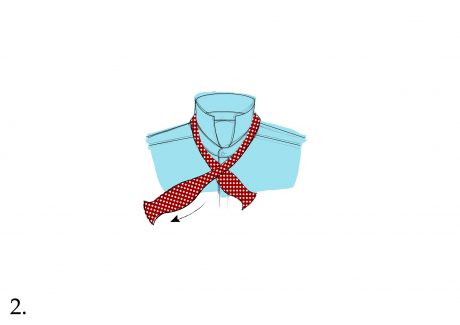
Cross the longer end (right) over the shorter end (left) close to the collar (but not too tightly).The ends should cross over at the slender part of the bowtie, as opposed to the curved areas.
Fold over the short end, creating a bow shape that lies horizontally and centrally on the body.
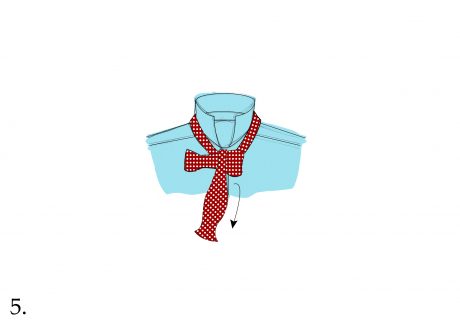
Pull the longer end down and over the folded short end of the bowtie (the bow), ensuring that it sits in the middle of the bow.
Fold the longer end of the bowtie, creating a second bow shape.Wrap the new bow around to the rear of the front bow.
Pull the new bow through the newly formed back loop. Your tie will now have a recognisable bow shape.
Tweak each side of the bowtie to tighten to your desired fit. The perfect bowtie when fastened should align with the width of your neck.
Practise makes perfect. Once you have your bow mastered, you will see find that it enters into your daily wardrobe and beyond just dresswear.
For those of you still struggling, do feel free to stop by the shop and ask for some tips in person. Christopher, James and Andy are great teachers on this subject.


